> For the complete documentation index, see [llms.txt](https://docs.watchdata.io/llms.txt). Markdown versions of documentation pages are available by appending `.md` to page URLs; this page is available as [Markdown](https://docs.watchdata.io/tutorials-and-guides/how-to-guides/how-do-i-add-watchdata-to-metamask.md).
# How do I add WatchData to MetaMask?
Sign up for WatchData and get your first API key! A detailed guide on how to create an account, you can find here:
{% content-ref url="/pages/uihAPTlLijn5xGO1GNiN" %}
[Quick start guide to WatchData!](/introduction/quick-start-guide-to-watchdata.md)
{% endcontent-ref %}
**Now create a custom RPC configuration in MetaMask**
Go to your MetaMask wallet and click on the network drop-down list at the top, selecting Custom RPC at the bottom.
 Then you’ll see the following screen:
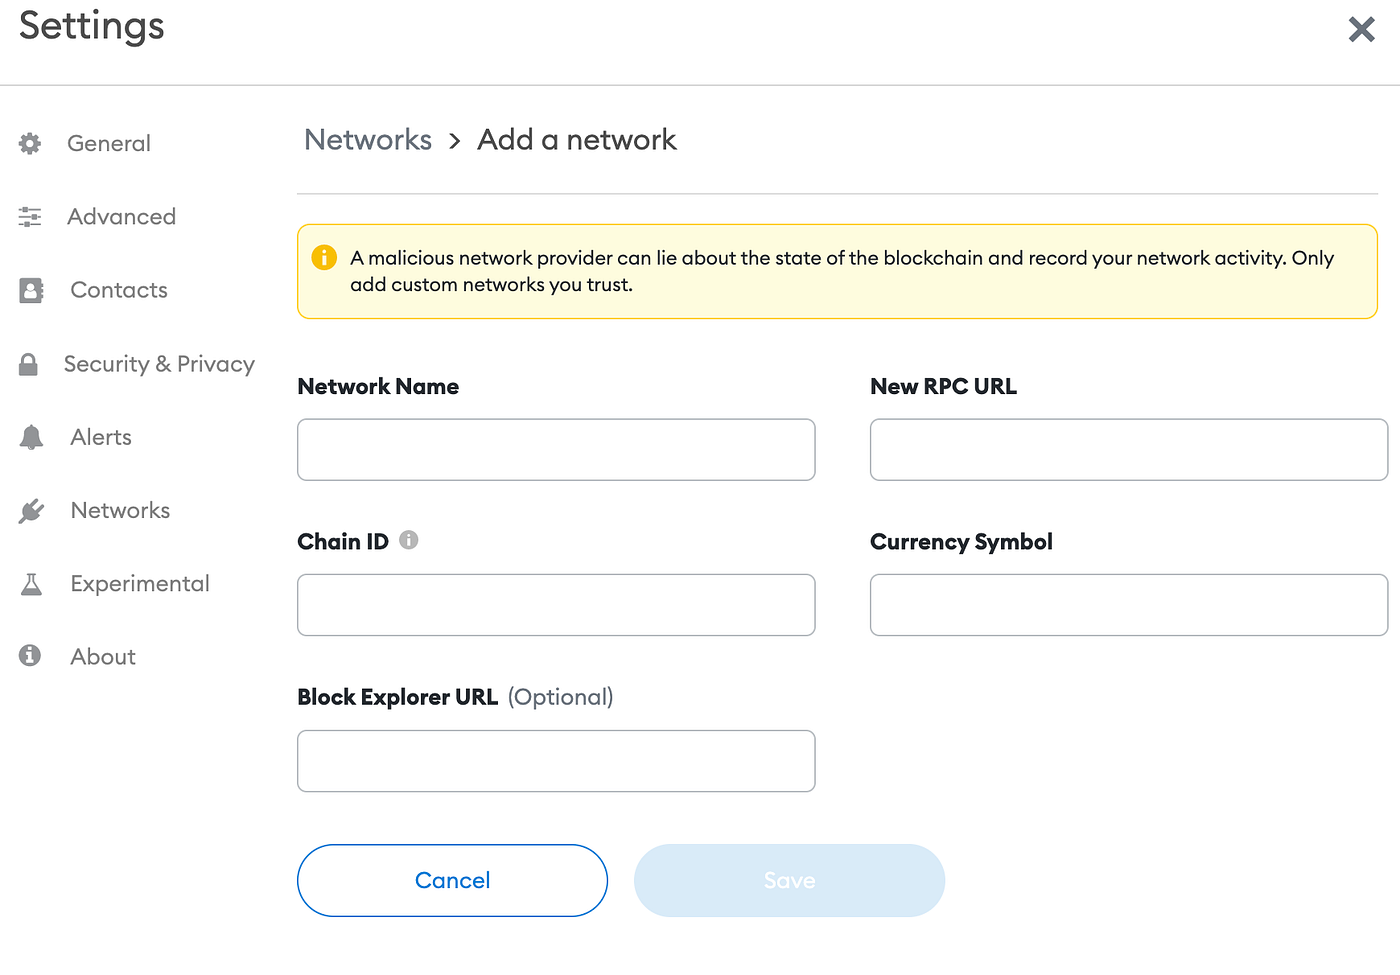
**Let’s fill in these fields with custom RPC information.**
1. For your network, you can assign any name you want. We will use the Ropsten test network and in this example, we will name it WatchData Ropsten
2. For the New RPC URL field, generate a key and copy the HTTP Link for the blockchain you need to work with.

Supported chains list here:
{% content-ref url="/pages/R8BrnXDWJZ2CJWqVDbIs" %}
[Supported chains](/introduction/supported-chains.md)
{% endcontent-ref %}
Your final HTTP link should look like:
```
https://ropsten.api.watchdata.io/node/jsonrpc?api_key=YOUR_API_KEY
```
3\. Find the chain ID for the network you want to connect to.
* Ethereum Mainnet — chainID = 1
* Ethereum Ropsten — chainID = 3
4\. **Currency Symbol** and **Block Explorer URL** are optional. For most chains, no input is needed here.
When you’re done, your configuration should look something like this:
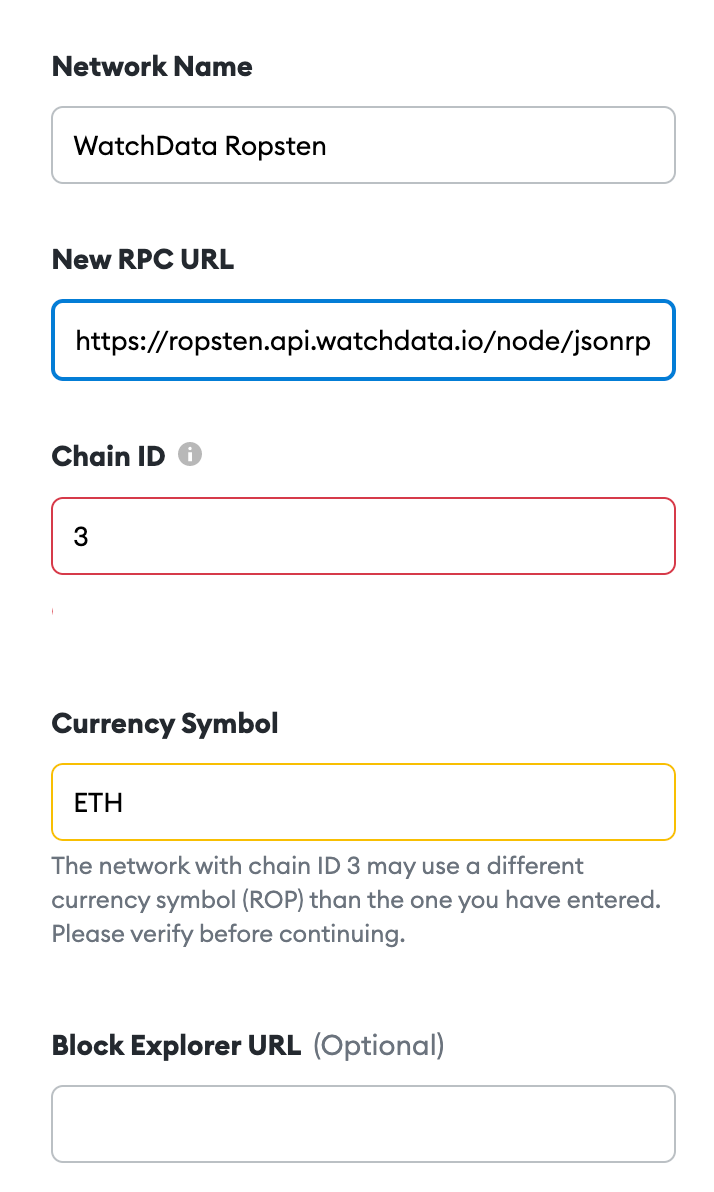
And don’t worry if you get a warning, for example: *“This Chain ID is currently used by the ropsten network.”.* This is just MetaMask reminding you that you have a different configuration for the same chain, which is fine. Once you’ve filled in these information fields, just click Save!
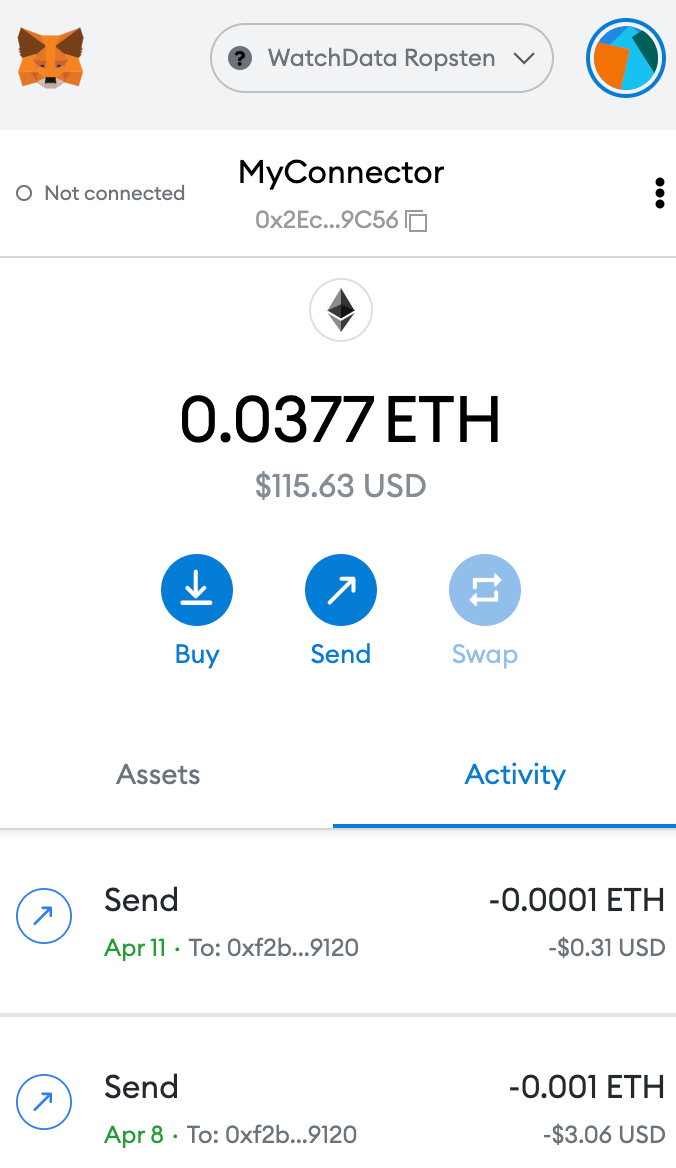
**And that’s it! You’re done!**
**We recorded a short video for you on how to add WatchData nodes to your Metamask**
{% embed url="" %}
Then you’ll see the following screen:

**Let’s fill in these fields with custom RPC information.**
1. For your network, you can assign any name you want. We will use the Ropsten test network and in this example, we will name it WatchData Ropsten
2. For the New RPC URL field, generate a key and copy the HTTP Link for the blockchain you need to work with.

Supported chains list here:
{% content-ref url="/pages/R8BrnXDWJZ2CJWqVDbIs" %}
[Supported chains](/introduction/supported-chains.md)
{% endcontent-ref %}
Your final HTTP link should look like:
```
https://ropsten.api.watchdata.io/node/jsonrpc?api_key=YOUR_API_KEY
```
3\. Find the chain ID for the network you want to connect to.
* Ethereum Mainnet — chainID = 1
* Ethereum Ropsten — chainID = 3
4\. **Currency Symbol** and **Block Explorer URL** are optional. For most chains, no input is needed here.
When you’re done, your configuration should look something like this:

And don’t worry if you get a warning, for example: *“This Chain ID is currently used by the ropsten network.”.* This is just MetaMask reminding you that you have a different configuration for the same chain, which is fine. Once you’ve filled in these information fields, just click Save!
**And that’s it! You’re done!**

**We recorded a short video for you on how to add WatchData nodes to your Metamask**
{% embed url="" %}